Sunday, August 21, 2022

Arches #7


I realise that you are probably over these arches by now. This series of photos are from the Sacred Heart Cathedral in Bendigo, the heart of the Victorian goldfields. It took 24 years to build and you can see the spire from just about anywhere in town.

I was there just as the sun was setting and really liked the shadows cast by the different parts of the arches. Unfortunately, there was a service underway when I was there so I didn't get to check out the interior.

Hang in there. Only two more cathedral photos to go and then I'll move on to something else.

Wednesday, August 07, 2013

SAQA Blog Hop - Journey

My entry was inspired after a nap.  I woke up and thought about getting started on my entry.  The deadline was looming and, as usual for me, time was running out.  I was staring at a cushion when Inspiration smacked me with both the idea and a plan.

I started with a packet of fabrics and a fat quarter of an Aboriginal fabric.  From there, the quilt just about made itself.
I had to audition fabrics to see what went best with the Aboriginal fabrics.
I cut out more circles that I care to remember before making a decision.  I liked it.
And here it is trimmed to size and finished with facings instead of a binding.
I have always liked raw edge machine applique and liked threads from some of the circles against the dark background fabric.  It was a nice contrast to the more finished edges with the blanket stitch.
I used the same fabric on the back as for the background and thought that the Aboriginal fabric for the hanging sleeve livened it up a bit.  A circle for the label just seemed like a nice touch.
We all walk around carrying our true selves inside.  But from outside, we tend to all look the same.  But when you are a part of a minority culture, you can walk amongst other people from other cultures but you carry your culture inside your heart.  And that journey is what makes us special.

Thursday, January 26, 2012

Co-Joined Cutting Matts

I was trying to trim a quilt that was longer than my large cutting matt.  It fit better on both of my large and medium cutting matts when they were laid next to each other.  
Which worked out really well.  Until I moved the quilt and the two matts got shifted away from each other, not a lot, but enough to expose my tabletop if I'd continued trimming.  Not good.  Time for Plan B.
I thought about taping the two matts together but was worried about adhesive residue left on one or both of the matts.  And would sticky tape be strong enough?  Which got me thinking. 
There are these cool Post-it Notes that I couldn't resist at the local office supply shop.  They might do the trick  Why not give them a go?  So I did.
I used the cool Post-it Notes and they worked a treat.  I stuck the matts together and flipped them over and they stayed together.  I shifted around the quilt and the matts stayed together.  When I was finished, the Post-it Notes removed easily and cleanly.
Problem solved!

Monday, October 24, 2011

How I Baste My Big Quilts in a Small Unit

I live in a small unit and I sometimes make large quilts, well, not king-sized but larger than A3-size.  While others have dedicated studios or large rooms that they can use, creative problem solving is required when space is at a premium and your family insists on living indoors.
First, the equipment I use:
  1. Two chairs
  2. Wardrobe door that I bought at Ikea.  This one was supposed to be white, but some of us don't always read instructions or the labels on boxes that are a bit awkward to lift.
  3. A box of large bull clips
  4. Lots of safety pins.  I like the bent ones but any safety pins will do the trick
  5. A handy gadget to close all those open safety pins.  I have two: a spoon with a notch cut out of the point and a wooden handle with a grooved post sticking out.  The notch and the groove help grip the pin so I can push it shut instead of using my fingers to do all the work
  6. Scissors

Second, prepare the space.  I use the chairs to support the wardrobe door.  I like to set it up next to the lounge so that I can sit comfortably while I pin.

Next, I lay out the three layers of my quilt:
  1. Backing fabric, face down
  2. Wadding or batting
  3. Quilt top, face up

Then I use the bulldog clips to secure the quilt to the wardrobe door.  I put the clips on one side and then pull the layers tight-ish before putting the clips on the other side.
As I pin each section, I remove the bulldog clips, shift the quilt over to the next un-pinned section and put the bulldog clips back on, one side at a time to be sure that the bottom layers lie flat.

And I keep doing it until the entire quilt is pinned.  I use the scissors to trim off any extra backing fabric or wadding and it's done.

For quilts that are wider than the wardrobe door, I use the same process but do half the quilt and then the other half and use extra bulldog clips on the ends of the wardrobe door and not just the sides.

Friday, October 14, 2011

Thread Dying with Lisa Walton

I recently went to Alexandra VIC take two days of workshops with Lisa Walton at the Vickery Quilt and Craft Retreat.
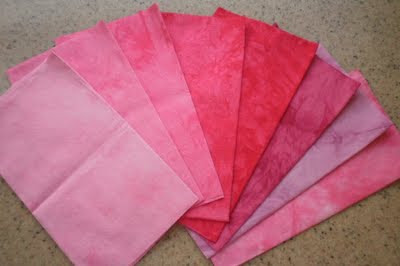
First, we dyed some threads and the odd fat quater.  Here are mine.
 And some close-up shots.
 
Very yummy.  But now comes the hard part ... how to use them and on which project?

More from the two days to come ... watch this space.

Monday, April 26, 2010

Two Small Sample Quilts

My friend Lisa Walton of Dyed and Gone to Heaven asked me to make some small quilts using some of her new fusible products. And here are my two attempts. The first was inspired traditional by Baltimore Album quilt blocks.


And the second sort of looks Japanese to me and just made itself.

Both of these samples are a bit less than FQ sized. I found them very easy to work with and lots of fun to quilt on the machine with my handy dandy walking foot.

If anyone is going to the AQC next week, you will be among the first to see the full range of fusibles that Lisa is now offering. Worth checking out.

Sunday, October 11, 2009

My Latest Quilt

Recently, I took an Aurora workshop with Lisa Walton of Dyed and Gone To Heaven and this is the result. So simple, even for those of us who are pathologically unable to follow the directions. Add to that good food, good venue and good classmates and I'm even happier with the results.

It is a bit of a variation on the original pattern, a planned variation for those who know me too well, because I decided not to cut the binding from the base fabric and use facings instead. That made the quilt a bit bigger ... more room for quilting and embellishments. And that is always a good thing.

The Sydney Quilt Show is only 8 months away ... can I get it done in time?

Updated on 11 October: For those who don't believe that I actually take workshops ... check out Lisa's blog for the proof. I'm the one in the red jumper (sweater).

Friday, September 25, 2009

My Kambrachallenge Quilt for 2009

We each started out with this tube of 40 7" squares, Blue and Green 1895 Bali Watercolours by Hoffman, two squares of each fabric.

The rules for the Kambrachallenge are simple: use some of each fabric in whatever you make for the challenge. So, I thought about it, off and on, until about a month before the unveiling. Got off to a good start by winding some bobbins and finding the tube of squares. Getting the tube open and the fabric out was a challenge in itself. Baby steps ...

I actually got started two weekends before the unveiling, raided my stash, had to unpick and resew the dark block which was as much fun as you imagine. And I finished about an hour or so before I had to be there. Plenty of time to spare ...

And here is my quilt top for the 2009 Kambrachallenge:

To see the rest of this year's Kambrachallenge quilts and the ones from previous years, go here.

Next year's challenge fabrics look like this:

For some reason I keep thinking of Pepto Bismol ... not sure why. But I am sure that by mid to late July I will be completely inspired ... if only by the looming early August deadline and not by the fabrics.

Thursday, September 24, 2009

How Long Did The Dust Last?

This is what the sky looked like at 6am yesterday morning ...

... and by 4pm it was another beautiful day in Paradise.

Wednesday, September 23, 2009

Dusty Sydney

When I got up at 6am this morning, I thought that the light looked a bit weird. Then I looked out the window and the sky was red. Really red.

So I did what any self respecting person would do: got dressed, grabbed the camera and drove down to the wharf.
Sydney CBD is out there ... somewhere ...
And, for this morning at least, someone's million dollar views are worth about $1.98
With visibility on the water down to less than 100 metres, there won't be any ferries this morning.

Tuesday, July 07, 2009

Visual Diary Envelope

After yesterday's creative frenzy, there was still another half of the textile collage left over. Time for another design for a visual diary cover ... this time, an envelope.

Repeat yesterday's process for finishing the edge, but this time starting with the inside edge of the envelope.


I used an expresso cup as a guide to rounding the corners of the top flap.


Here, the top corner is marked and the bottom corner is cut. I tried to cut around the expresso cup with a rotary cutter while holding the cup in place, but found that drawing first and cutting second was easier.

Here is the rounded flap all cut and ready to be finished.

I added the hook side of a piece of velcro for the closure to the inside edge that will be covered by the rounded flap.

A close-up of the stitching on the hook piece of velcro. A couple of times around should make sure that it holds up to repeated opening and closing of the flap.

Being an Engineer, I checked again for fit before sewing the sides together. Looking good.


To finish assembling the envelope, I sewed with zig zag stitch and my handy dandy walking foot around the sides and rounded flap back and forth 6 times so that the edge was well covered but not too bulky. Using rayon thread gives the finished edge a nice sheen.

I think that the loops part of the velcro closure to the rounded flap side should go ... about ... here.

And it's done. Took longer to upload the photos and write about it than it took to make.

As for the finished visual diary envelope, here's the back ...

... and here's the front.

I think that this one turned out pretty well too.

Monday, July 06, 2009

Visual Diary Pocket

I've recently switched from using a spiral bound visual diary to one from Moleskine. While I like the paper in the Moleskine diary better, I miss being able to put my pen in the spiral binding of my old visual diary. And I am pretty much over searching for my pen. So, I decided to make a pocket for my Moleskine visual diary that had room for a pen as well.

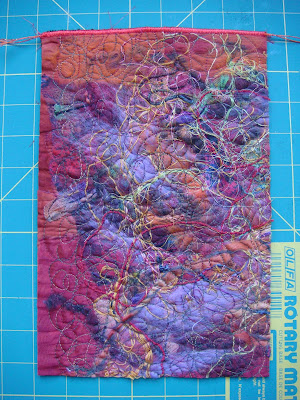
This is a textile collage that my friend Lisa Walton of Dyed and Gone to Heaven gave me a while back. I used it in a faux felt demo I did at the SCQuilters Retreat in Perth. Actually, just half of it.

Looks like it will be big enough ... Houston, we have lift off!

I trimmed up the textile collage and folded it in half. One more check on the size ...

... perfect. Now which thread to use? This is why you need a nice stash of threads ... dark orange rayon ... bright orange rayon ... a very rich orange cotton ... decisions, decisions, decisions ...

I think the dark orange rayon will do the trick.

First step was to stitch across the top of the pocket. I used a wide zig zag and caught two strands of pearle cotton under the stitch. I think that it makes for a nicer edge and maybe makes the edge a bit less likely to stretch over time. Then I did 4-6 more zig zags across the edge, a bit narrower this time, to fill it in and be sure that the edge was well covered.

Here's a close up of one of the corners. You can see the pearle cotton caught under the stitching.

And here's the back. Yes, I used a bright pink cotton in the bobbin. Trying to decide if the pocket needs to be lined. Nope. Looks OK as is to me.

To finish making the pocket, I switched from the open toed embroidery foot to a walking foot, reduced the pressure on the presser foot from 3 to 2 (we're sewing through quite a few layers here). I stitched down the side 1/4" from the edge back and forth a couple of times, going slow enough to hit the same line of stitching each pass. I did the same thing across the bottom.

Then I zig zagged the raw edges ... remember, no lining ... to keep things inside nice and tidy. I didn't zig zag around the corner but stopped before I got there.

Here's a close-up of the top of the pocket ... notice that I stopped the zig zag before I got to the stitching at the top edge.

I cut the notch off the corner to reduce the bulk when the pocket is turned right-side out. Here's a close-up of the corner.

And, just for completeness, a close-up of the corner on the folded side.

This took some determination. Two layers of felt in the middle makes it sturdy but a bit resistant to being turned right-side out.

I used a chopstick to get the corner with the notch cut into it to look like a sort of square corner.

Another size check ... I can't help myself ... it's an Engineer Thing.

And here's the finished visual diary pocket.

Very good job, if I do say so myself. Now, what to do with the other half of the textile collage?