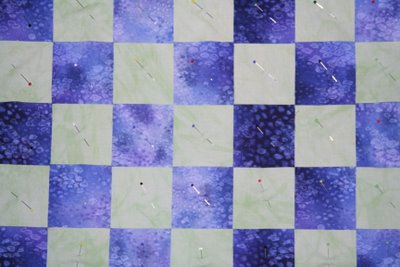
I took one of my hand-dyed fat quarters and a commercial fabric fat quarter and, faithfully following the directions, wove them together. I wasn't too sure how wide to cut the strips so decided on 2 1/2".
 These strips, even though they are pretty wide, are slippery suckers and just won't stay put. And that made the weaving a bit of a challenge. But I got there in the end. So, before I started pinning, I did what every good engineer does ... thought it through before jumping into the breach.
 The most stable part of each fat quarter is the edge that I didn't cut through when I cut the strips. The hand-dyed fabric had 4 cut edges so it didn't matter which side I kept intact. But the commercial fabric FQ still had a selvedge, so I left that one intact.
When I wove them together, I formed a corner where the two un-cut edges came together. That would be the most stable part of the piece and the best place to start pinning. I was working on a table with a smooth surface and every time I put a pin into the woven layers, the strips moved. Even pinning them, starting from the corner formed by the two un-cut edges, didn't help. And every time I moved the piece, things between the pins shifted.
 Now I understand why, in her book, Wendy recommends using water-soluable stabiliser as a foundation. So, the next step is to follow the directions and repin the piece onto waster-soluable stabiliser, which I just happen to have here somewhere ...


2 comments:
LOLOL Sounds very frustrating Maggie but you've managed to make me want to try weaving with fat quarters... and there I was all innocent just browsing your Blog and now I have another project in my head!! :-) Pennie
What? WHat! follow directions? Where's the fun in that?
Post a Comment